Image Sequences
Sometimes it’s helpful to render a composition as a folder full of still image files as opposed to e.g., a Quicktime file. This is called an image sequence.

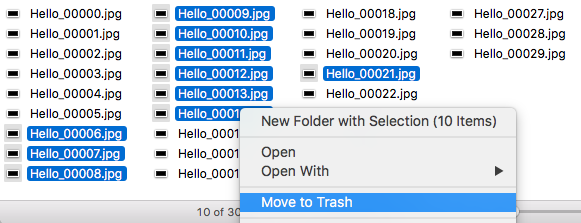
In the illustration above, a comp called Hello has been rendered as an image sequence. Each frame is output as a separate .jpg file, each numbered chronologically from 00000 to 00029 (30 files total). Audio is stored elsewhere; image sequences are silent.
(Rendering longer comps can potentially create a folder with thousands and thousands of image files. Lower-powered computers can become sluggish when trying to deal with folders with so many files. At a certain point you may need to break up such a render into multiple renders into separate folders.)
Uses for image sequences
While it’s usually simpler to render Quicktime files, in some cases images sequences can be very helpful.
-
ENABLES Re-Rendering Sections Of Existing Renders
This is not possible with Quicktimes — you have to re-render the whole file. With images sequences, you can delete the files that represent the section to re-render, and then tell AE to only render the missing frames.
Deleting Sections Of An Image Sequence -
Resilient To AE Render Crashes
If AE crashes during the render of a Quicktime file, the work up until that point will be lost, and the render must start over. With images sequences, AE can pick up where it left off.
-
Support For FANCY Bit Depths & COLOR MANAGEMENT
Projects that deal with 32-bit color depth, linear color, and/or that use a non-vanilla color profile, will probably not be able to render out all that detail and info to any Quicktime or AVI formats. An ima
-
Archival Of Important Video
Files on disks can get corrupted over time. When a Quicktime file gets corrupted, the whole file is usually lost. With an image sequence, only the corrupted frames are lost.
-
Multi-Machine Rendering
Share a folder on the network and then render an image sequence to that folder from multiple computers each running AE. Each computer simply renders the next “missing” frame.
[More detailed info on the pros and cons of image sequences may be found on this page.]
Rendering an image sequence
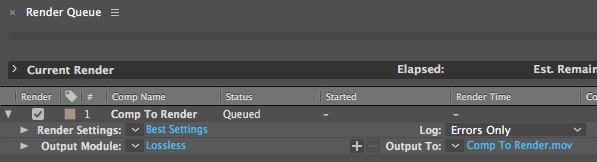
In AE, you can choose to render as an image sequence from the Render Queue panel. Click on the blue word Lossless next to the Output Module chooser.
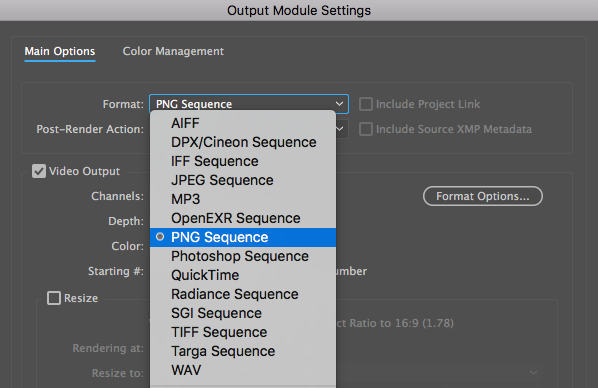
The Output Module settings window will open, and in the Format section you can choose from various output formats, among which are several Image Sequence formats.
PNG Sequence is a nice basic choice, since it is lossless, compressed, allows for including alpha (transparency) info in the render, and if needed can do Trillions of Colors (for 16-bits per pixel projects.)
Click OK, then back in the Render Queue panel you’ll see that the Output To option now looks like this:
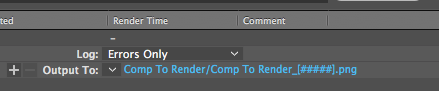
Which means that when rendering, AE will create a folder called Comp To Render and begin putting .png files into that folder with names like:
Comp To Render_00001.png,
Comp To Render_00002.png,
Comp To Render_00003.png,
…and so on.
These names are based on the composition’s name, but you can click on the blue text to change the output filenames if you like.
Importing an image sequence
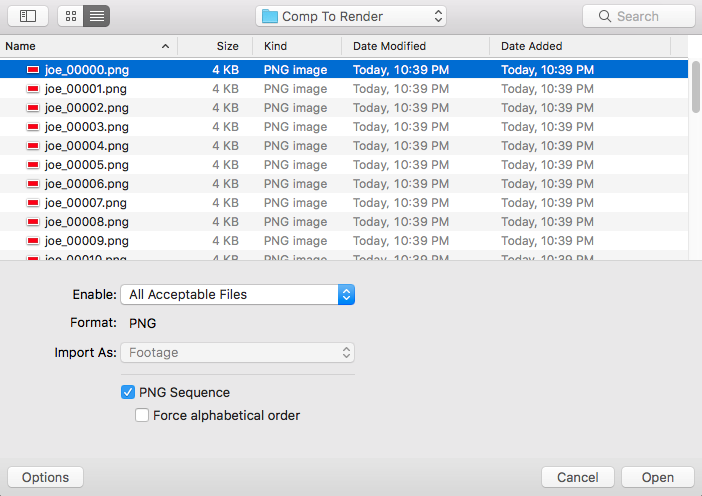
To import an image sequence into After Effects or Premiere, select the very first image of the sequence and make sure the PNG Sequence option is checked like below:
No inherent frame rate,
so use “Interpret Footage”
Image sequences do not have an inherent frame rate, unlike Quicktime files, say. In other words, if you handed me a Quicktime file, I could tell you its frame rate. But, if you handed me a folder full of .JPGs, I wouldn’t have a clue what the original frame rate was.
So, when importing an image sequence into AE or Premiere, you must specify/verify the frame rate or the app will use some default guess, such as 30fps etc. (Some programs allow you to specify a default frame rate when importing.)
In AE and Premiere, you can change the frame rate of an image sequence via the Interpret Footage command. In AE you would select File > Interpret Footage > Main… in order to make adjustments.
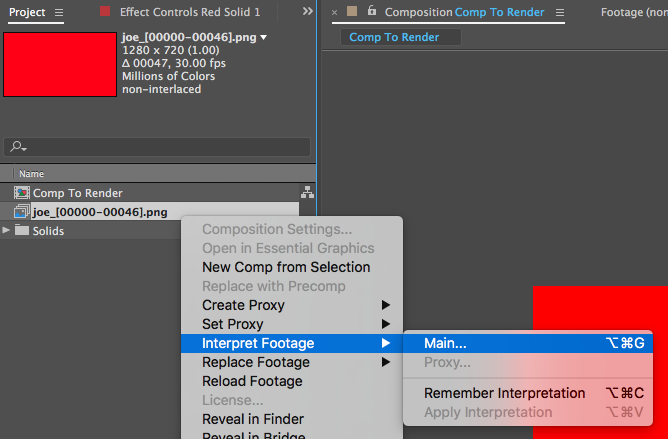
Use the Interpret Footage settings window to set the frame rate appropriately. It should match the original source material’s frame rate, natch.
“Skip Existing Files”
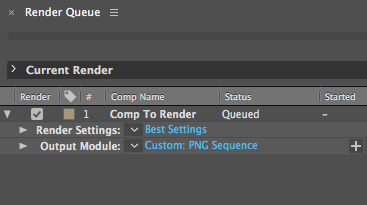
Image sequence benefits such as recovering from failed renders, being able to re-render sub-sections of a composition, or multi-machine rendering won’t work until you enable Skip Existing Files in the Render Queue. Open the Render Queue and click on the blue text saying “Best Settings” (next to Render Settings) as in the image below.
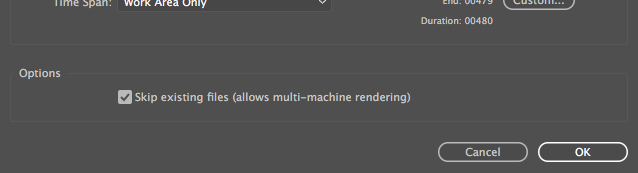
This will open the Render Settings window where you should enable the Skip Existing Files checkbox:
Now, when you re-render an image sequence into the same folder as an existing render, it will automatically skip any existing files.
A crashed render will pick up where it left off, you can manually delete frames you want to re-render, and multiple computers can cooperatively render to the same network folder.
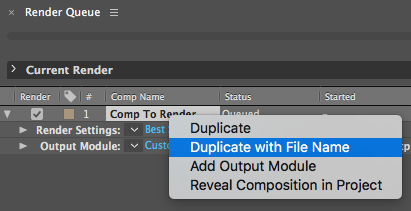
In the Render Queue, use “Duplicate with Filename”
To take advantage of the Skip Existing Files setting, you have to make sure to render to the same folder and filename(s). Otherwise, you’ll probably accidentally create an entirely new folder of image files. Nasty.
In the Render Queue, select the name of the comp and do Edit > Duplicate with File Name to duplicate a render task and preserve the output folder and filename(s). It’s also accessible via a right mouse click.
Smooth playback in Premiere
When working with imported image sequences in Premiere, you may want to make sure that the image sequence clips get pre-rendered to Premiere Preview files so that they play back smoothly.
Multi-Machine Rendering (aka Render Farming)
This can help speed up a long render by getting multiple computers to all render the same comp at once. The general idea looks something like this:
- Share an output folder on the local network
- In your AE project’s Render Queue, set up a render item that is an image sequence with the Skip Existing Files setting checked
- Set the Output To option to point to the network folder
- Save the AE project, which also saves that render item
- Open that AE project file on multiple computers on the network
- Render that render item from each computer
Each computer will render frames to the shared network folder. The Skip Existing Files option causes each computer to render the next missing file. Faster computers may end up rendering more frames on average.
Watch Folders, Collect Files, command-line render, etc
Check out the following for more in-depth info on network rendering in After Effects: