Extrusion of Text and Shape Layers
[ Lecture | Lab | Homework ]

By default, AE handles the rendering of 3D layers using its so-called “Classic 3D” renderer, which was originally added in 2001.
Classic 3D is a good default choice for 2D comps with a bit of basic 3D, but can be limiting for more advanced 3D projects. For example, in Classic 3D mode, all 3D layers are essentially rigid, flat planes with zero thickness, there are no reflections of light on surfaces, and there’s no refraction (e.g., bending of light in water.)
Then, more than 10 years later, in 2012 Adobe added a fancy-schmancy “Ray-traced 3D” renderer option as an alternative to the Classic 3D mode.
The Ray-traced 3D mode allows extrusion of text and shapes layers, as well as the curving or bending of any other type of footage layer. Looks very nice at max quality, but is pretty slow (without the right hardware.)
In 2016 Adobe added the “CINEMA 4D” renderer option. Essentially the same as the Ray-traced 3D option but usually lots faster. Currently the Adobe-recommended choice for doing extrusion (or curving/bending.)
Setting Up For Extrusion
Create a new comp.
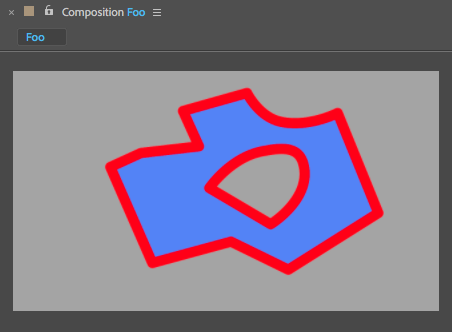
Create a new layer to extrude. Since extrusion only works with Text layers or Shape layers, create either a new Text or Shape layer.
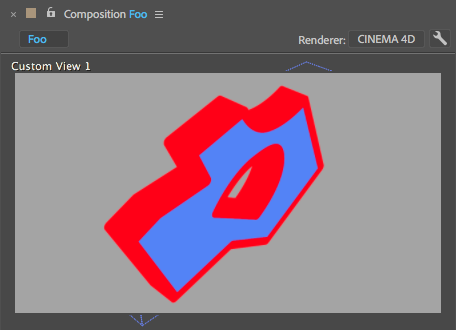
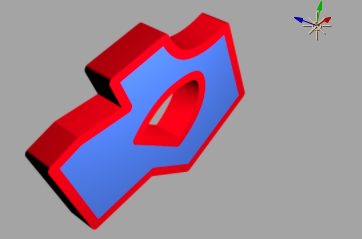
FYI, In the Shape below, a hole is cut out of the middle using a subtractive Merge Paths operation.
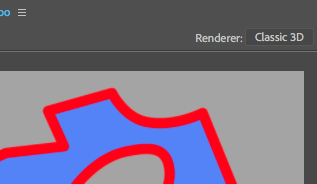
Make this layer a 3D layer. Now that a 3D layer exists you should see the Renderer options button in the top-right of the comp window:
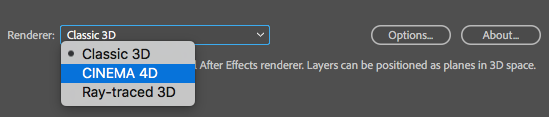
Click the button (with the word “Classic 3D” on it) to open the Composition Settings window (with the 3D Renderer tab already open.) Change the Renderer choice to “CINEMA 4D.”
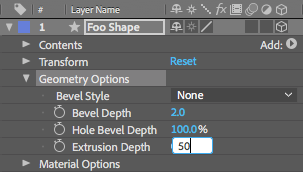
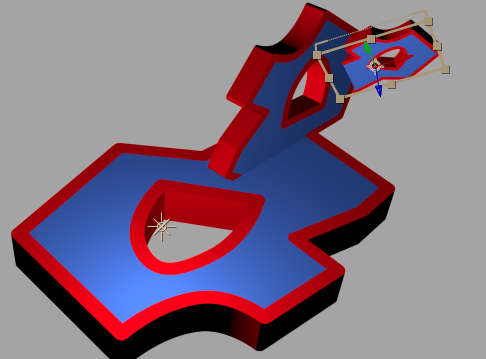
Click OK to dismiss the window. In the Timeline, twirl open the layer to reveal its properties. There will now be a new Geometry Options property group with an Extrusion Depth property. Change it’s value to something like 50 or so.
In the Comp view panel you might not see much change, since the extrusion is extending away from the camera, behind the shape or text. But if you rotate the extruded layer, or switch to a different camera angle such as Custom View 1, you can see that the layer now has some thickness.
Add a new Light layer in order to see what’s going on a bit better.
Beveled Edges
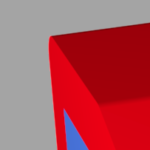
You can give your extruded shapes and text layers a beveled edge.
Under the Geometry Options property group choose a Bevel Style. You can choose None, Angular, Concave, or Convex:
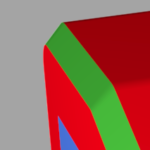
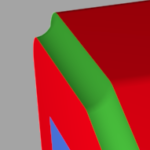
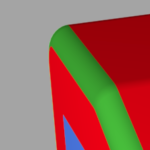
Once a Bevel Style is set you can also customize the Bevel Depth (thickness of the bevel) and Bevel Hole Depth (thickness of bevel around the holes in shapes.)
Changing the Colors
Let’s change the color of the Sides of the extrusion. We need to add this property because it doesn’t exist yet on this layer. We’ll do this in the Timeline panel.
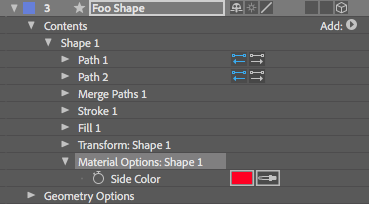
Changing Side Color: Shape Layers
For Shape layers, first select a Shape Group under the Contents property group:

..and then click the ![]() button to open the Shape attributes menu where you can select Side > Color:
button to open the Shape attributes menu where you can select Side > Color:
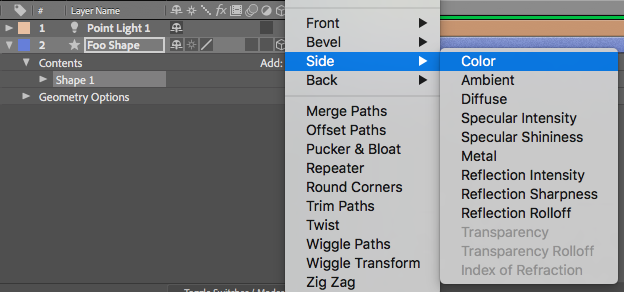
The Shape layer will now have a new Side Color property that you can customize and/or animate:
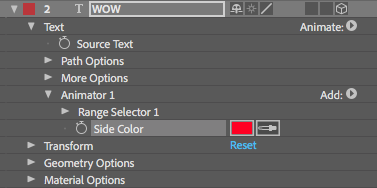
Changing Side Color: Text Layers
For Text layers the process is similar but a tad different. Open up the Text layer’s properties in the Timeline:
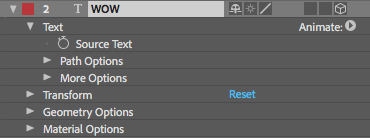
..and then click the ![]() button to open the Text Property Animation menu where you can select Side > Color > RGB:
button to open the Text Property Animation menu where you can select Side > Color > RGB:

The Text layer will now have a new Side Color property that you can customize and/or animate:
Changing Other Colors and Properties: Front, Back, Bevel
You can use the same technique for adding a Side Color property to add various other properties to the Front, Back, and Bevel of the extruded layer.
Final Note: Nesting 3D Comps
In order to nest comps with 3D layers into a 3D hierarchy of parts that can still be manipulated as a whole in some outer comp, you must enable both the 3D Switch ![]() and the Collapse Transformations Switch
and the Collapse Transformations Switch ![]() as in the image below:
as in the image below:
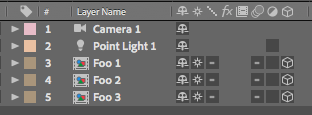
In this particular outer comp there’s a Camera and a Light, and AE will use them when viewing or rendering this comp.
But! If there are any Cameras or Lights within the nested sub-comps, they will be ignored.
In other words, with nested 3D comps only one comp should contain your cameras and lights (in general).