Intro to CINEMA 4D Lite
“CINEMA 4D Lite” (C4D Lite) is a separate application that comes bundled with After Effects. It’s a feature-reduced version of CINEMA 4D, which is a full-fledged 3D modeling, animation, motion graphic and rendering application developed by MAXON.
- 3D Modeling: creating the objects, their look, surface texture, how shiny or reflective surfaces are, cameras & lights
- Animation: moving stuff around and changing other values using keyframes (just like AE, but now done in C4D)
- Motion Graphic (MoGraph): tools for cloning, animating, and manipulating objects without keyframes (aka “procedurally” — e.g., fracturing an object into many pieces for an explosion)
- Rendering: takes the objects and their various animations and simulates the physics of real-world light rays in order to generate a photo-realistic view of a scene
In 2014, Adobe started bundling a Lite version of C4D with After Effects in a partnership with MAXON, who also created a new built-in effect for AE called Cineware. The Cineware effect is like a bridge or tunnel between AE and C4D Lite. Both programs typically run simultaneously when using C4D Lite, which must be launched from within AE.
It All Starts With A .C4D File
First you’ll need a CINEMA 4D document file, which will have the extension “.c4d” and which will continue to be where all CINEMA 4D related work is stored. In other words, you’ll keep track of two doc files from here on out: the AE doc file (.aep) and the C4D doc file (.c4d).
The .c4d doc file can be created within AE, or it might already have been created by someone else. You can import an existing .c4d file just like any other asset and drag it into a Comp.
To create one within AE, first create a Comp. Then choose the menu item Layer > New… > MAXON CINEMA 4D File… (or use right-click in the Timeline panel of an open Comp.) You’ll be asked where to put the new .c4d file and what to name it. After Effects will then create a new 2D layer in your Comp (with the Cineware effect applied) to represent the output from C4D.
Finally, if all goes well CINEMA 4D Lite will launch and open the new .c4d file, ready for editing. From now on, whenever you save this file in C4D it will automatically update in AE. If you close the C4D application, you can always re-launch it by selecting the .c4d file in AE and choosing the Edit > Edit Original… menu item.
Moving the camera around in C4D
It’s nice to first know how to move the camera around in a scene. One way is to click and drag on the little black icons in the top-right of any viewer window. (Only the first three of the four icons works like this.)
You can also hold down the 1, 2, or 3 keys and then click-drag anywhere in the viewer to move the camera around. The 1, 2, and 3 keys correspond to Track XY, Track Z, and Orbit, respectively.
Basic object manipulation
Let’s make a cube to manipulate. Click the Cube button in the main toolbar:

Now you should have a new cube like this:
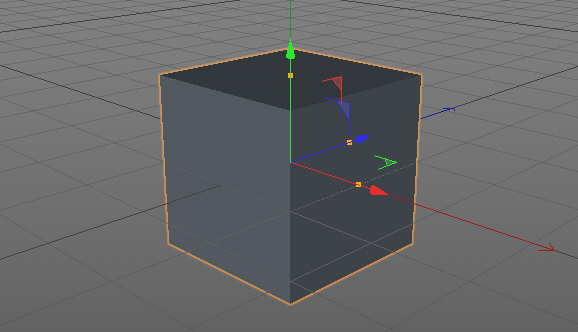
In the main toolbar are 3 buttons for basic manipulation of the cube: Move, Scale, and Rotate: 
Each button will decorate the object with slightly different controls for manipulation (such as the arrows for Move.)
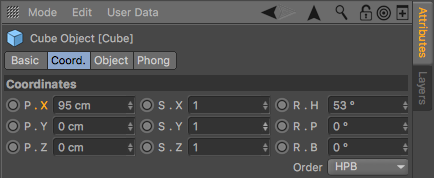
With the object selected you can also enter values directly using the Attribute Manager:
Adding another object
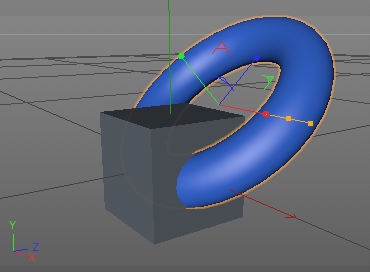
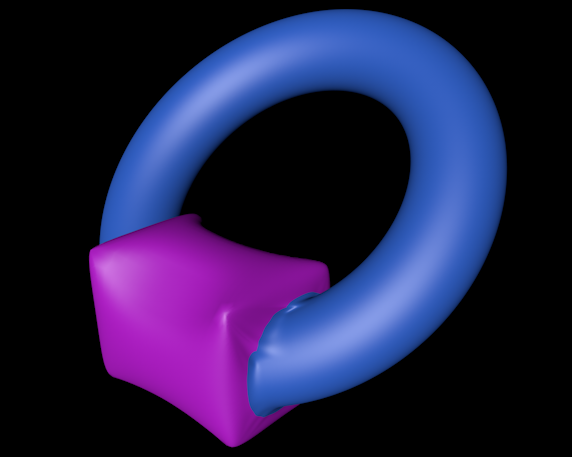
If you click and hold the Cube button from before, you’ll see a bunch of other objects you can add. Let’s add a Torus and manipulate it a bit:
Rendering the current frame
In the main toolbar are some buttons for rendering:
Click the 2nd one, the one in the middle, to open the Picture Viewer. This is where you can see what the final render will look like:

If you click the 3rd of the render buttons, the one on the right, the Render Settings window will pop up.
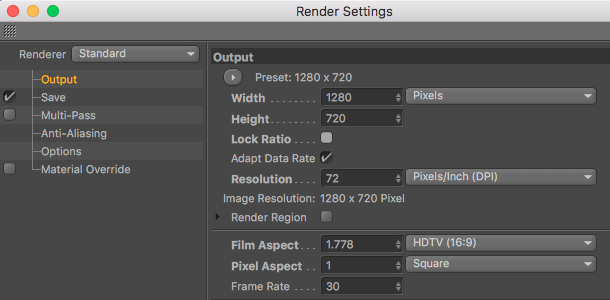
Among other things, here you can change the resolution and frame rate of the render if it doesn’t match your Comp settings in AE.
Adding some color with Materials
The default color of gray is kind of boring, so we’ll create a new Material that we’ll use to paint our objects.
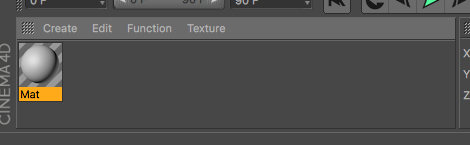
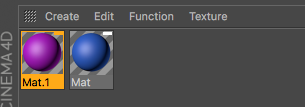
Select Create > Material > New Material from the main menu. In the Material Manager in the bottom-left of C4D you’ll see a new Material:
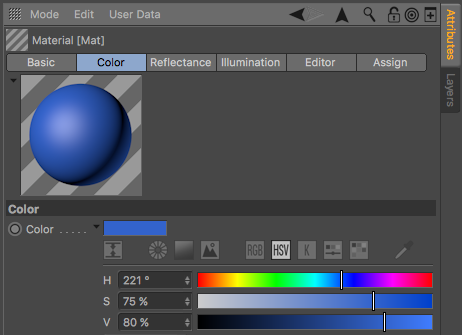
With the new Material selected we can use the Attribute Manager to change its color to blue:
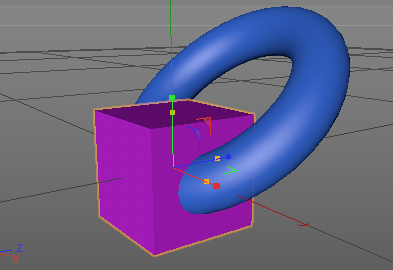
Now we can drag-and-drop the Material onto any of our objects to paint them blue:
You have to make a new Material for each color:
Adding and switching between cameras
tbd.
Intro to the basic “objects” and modeling
- “Objects” – cube, torus, plane, sphere, pyramid, cylinder, etc
- Splines – various kinds of (non-filled-in) lines: circle, arc, helix, etc
- Generators – things you give inputs, and in return you get an object: extrude, sweep, lathe, etc
- “Modeling” – operations that act on objects and that result in new objects
- Deformers – things that bend and distort objects
Parenting in the Object Manager
Grouping, Generators, Deformers, etc
The “Make Editable” command
Parametric Object vs Polygonal Object
Object maths: the Boole Object
The Boole Object is a modeling object that can be used for things like subtracting an object from another object, or union-ing two objects together, or intersecting two objects, etc. It operates on its children.
After setting up a Boole object, you can use the Make Editable command on it to merge the work into a single Mesh. Just make sure Make single object is set in the Boole object’s attributes before doing Make Editable.
Editing objects at the polygon, line, or point level of detail
Once an object has been converted from parametric to polygonal, you can use the various editing modes on the left to modify the object at a fine detail.
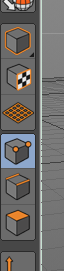
The 1st, the cube with an orange outline is called Model mode. It lets you select and manipulate one or more objects.
The 4th, the cube with two orange points selected is called Points mode. It lets you select and manipulate one or more points.
The 5th, the cube with the two lines selected is called Edge mode. It lets you select/manipulate the edges of objects.
The 6th, the cube with one face selected is called Polygon mode. It lets you select/manipulate the faces (aka polygons) of objects.
Subdivision Surfaces
A Subdivision Surface modeling object generates a smooth, organic shape based on a child input object.
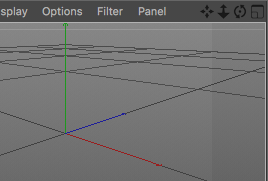
(View Window) > Display > Quick Shading (Lines)
Allows us to see the polygon lines.
(View Window) > Filter > SDS Cage
Displays the cage that the subdivision surface is based on.
Disable: (View Window) > Options > Isoline Editing
Allows manipulating the SDS cage directly, instead of the new object.
The Weight Subdivision Surface tool with and without the shift key
UV Mapping
tbd.
Animating with keyframes in C4D
CINEMA 4D has animation with keyframes just like AE, but the approach is a little different.
Motion blur
In C4D, select the moving object. Add a Motion Blur tag. In the Render Settings, click the Effect… button to add the Sub-Frame Motion Blur render effect.
In After Effects, you have to use Standard (Final) as the Renderer property in the Cineware effect in order to see the motion blur.