“Intermediate After Effects (pt. 2)”
Mask animation, Nesting Compositions, Intro to Null Object layers
Mask Animation
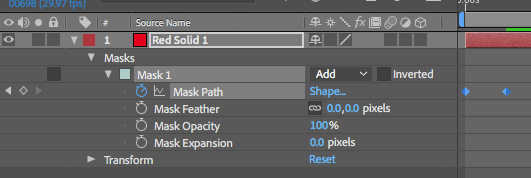
When masking moving footage (to isolate a foreground element from its background for example,) you’ll often need to have the shape of the mask (or masks) change over time. To do so, you add keyframes to the Mask Path property of a Mask.
- The Basics
- After creating a Mask on a layer, open its properties in the Timeline panel and enable keyframes for the Mask Path property by clicking on its Stopwatch icon
- (Sometimes it can help to temporarily set the Mask’s mode to None so that you can still see the rest of the footage while you’re animating. Just set it back to Add or Subtract when finished.)
- Move to another point in time and adjust the shape of the mask by moving its vertices. This will create a new keyframe. Each individual Mask Path keyframe contains all the info for the mask’s shape. (In other words, there won’t be individual keyframes for each vertex of the mask.)
- Note: It’s important to keep a particular vertex near its original feature that you’re masking. For example, a vertex near an armpit at one point in time should be the “same” vertex near the same armpit later in time. (Under the hood, AE numbers each vertex and uses this numbering during the shape-change interpolation.)
- After Effects will interpolate a morph of the mask between keyframes. It uses a linear interpolation to do so, as opposed to using any easing.
- Divide & Conquer: When you preview the result, if the morphing strays too far from what you want, you may need to add more keyframes in between the original two keyframes to bring the transition back on track.
- You can animate the masks on Adjustment Layers in order to animate the region that its effects are applied to.
- If you use the Pen tool to add more vertex points to an animated mask, AE will add those new vertex points to all the existing keyframes. (It will try to be smart, but you may need to adjust its efforts.)
- You can animate the masks on Text layers to reveal text over time.
- More complex subjects may require breaking a foreground element into smaller components that are each masked separately. For example, a running horse could be broken down into the body and the various leg parts. This way, you are mostly moving many masks around as opposed to trying to use one mask to achieve many different shapes.
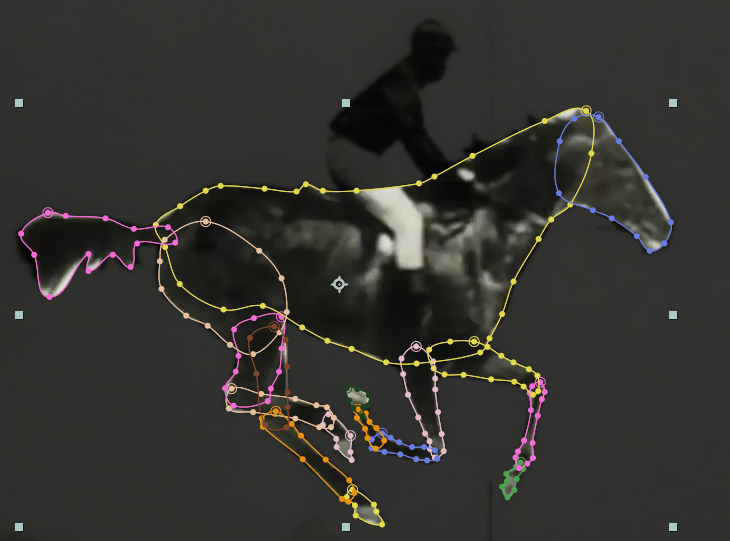
Muybridge’s horsey. Beware! This is a very time-consuming example. - Advanced Mask Path Manipulation
- The simplest way to manipulate the vertices of a Mask Path is to move each vertex individually, but this can get tedious when animating.
- To speed things up a bit, AE provides a Free Transform Points mode for editing multiple mask vertices as a group.
- First, select a Mask or a Mask vertex (or segment between vertices) to enter Mask Editing Mode
- In this mode, the cursor changes to resemble an arrow-head more so than a typical arrow symbol, and you can now see which vertices are selected and which are not by the hollow / non-hollow indication.
Hollow vertices are unselected, solid vertices are selected - You can hold down SHIFT and click on a vertex to toggle its current selection state, thus adding or subtracting it from the current selection group
- You can also drag a selection rectangle around a group of vertices to select several at once, or SHIFT-drag a rectangle to toggle their selection state
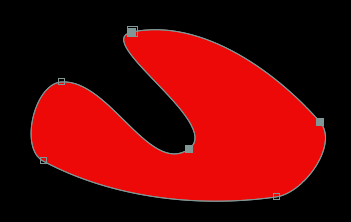
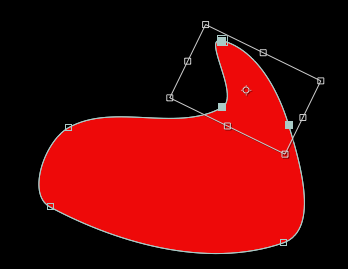
- Once you have a group of vertices selected, you can enter the Free Transform Points mode. Either double-click a vertex in the selection, or use the menu item Layer > Mask and Shape Path > Free Transform Points.
- Now there will be a free transform box around the selected vertices like so:
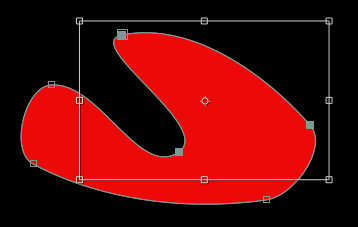
Free transform box - The free transform box can be used to move, rotate, and scale the selected group of vertices. You can hold down COMMAND (Mac) or CONTROL (PC) to transform relative to the anchor point. You can hold down SHIFT to constrain the transformations. You can move the temporary anchor point without changing to the Anchor Point tool.
Vertices transformed - To exit the Free Transform Points mode, double-click anywhere outside the selection or simply hit Enter on the keyboard.
Nesting Compositions
- Great way to compartmentalize complexity so that no comp gets “too crazy” with tons of layers
- Great way to change many duplicate components at once
- Great way to apply effects or transformations to multiple layers at once when using an Adjustment Layer is not convenient
- Workflow 1: Building Up From Simpler to Complex
- Start by creating pre-comps
- Drag pre-comps into other, “increasingly complex” container comps
- Workflow 2: Nesting After The Fact (aka ‘Pre-Composing’)
This approach is used when you want to employ nested comps within a composition you’ve already put work into.- “Pre-Compose” is a command which takes one or more layers, puts them in a new composition, and replaces the original layers with the new comp
- “Leave all attributes” – this option is for when pre-composing a single layer – all effects and modified properties are left in the containing comp
- “Move all attributes” – only option when pre-composing more than one layer – all effects and modified properties of selected layers are moved into the new pre-comp
- “Pre-Compose” is a command which takes one or more layers, puts them in a new composition, and replaces the original layers with the new comp
Intro to Null Object Layers
Occasionally you may find the need for an invisible parent layer. This is one of several cases where Null Object layers can be useful.
To create a Null Obect layer, either select the menu item Layer > New > Null Object or simply right-click in some empty area within the Timeline panel and select New > Null Object.
Then you can parent other visible layers to the Null Object layer, or even parent other Null Object layers to each other for some advanced animation mechanics.