“AE basics (pt. 3)”
Back-and-forth between AE and Premiere, Solid Layers, Adjustment Layers, Parenting
- Back-and-forth between AE and Premiere
Sometimes we need to use After Effects to manipulate footage that already exists within an edited sequence in Premiere (or Final Cut, etc). And other times we need to use After Effects to generate some footage from scratch that will later be imported into Premiere. The following section describes the basic workflow when going back-and-forth between AE and Premiere. This is sometimes called “round-tripping.”
- (If you don’t need to base your AE work on something already in your Premiere edit (i.e., you are creating a clip from scratch in AE) then you can jump right to Step 6)
- In Premiere, mark an IN and an OUT point in your sequence.
- Export the clip(s) to a quicktime file using a good Intermediate Format (eg, ProRes or DNxHD)
- Import the exported file into AE and drag it onto the New Comp button to create a new comp containing the import.
- Now, is the file from Premiere being used merely as a reference? (Like for overlay titles maybe?) Then make the imported layer a Guide Layer. It won’t show up in the final render.
- Do some super nifty and creative stuff in After Effects.
- Render the composition to a Quicktime file using an Intermediate Format. If you need to preserve any Opacity (aka transparency) info in your render, you’ll need to choose a format that supports it (eg, ProRes4444 or Animation)
- Back in Premiere, import the new AE-rendered Quicktime
- Drag the new import onto a video track above the original clip(s) that you exported (back in step 3)
- Watch the edit, looking for ways to tweak or improve the AE work.
- Return to AE, make changes, re-render to the exact same filename as before. The new render will automatically show up in Premiere!
- Here’s where the process begins to loop: go back to step 10 and repeat until you’re satisfied with the edit.
- Solid Layers
- Used for creating simple solid-color layers which might be used as-is, or as a base for further work:
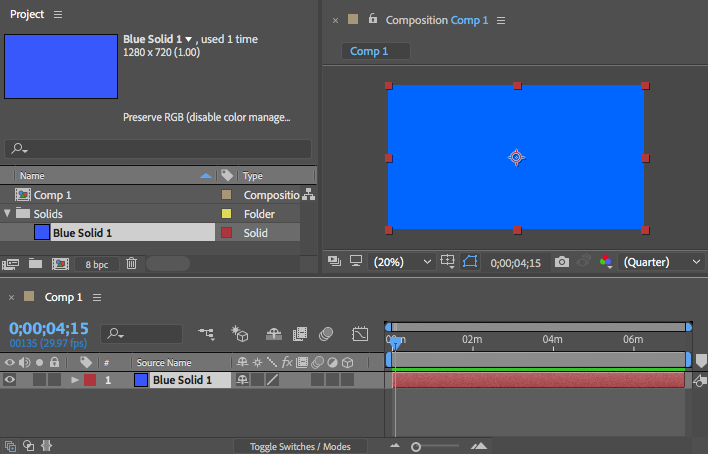
A comp with a single blue Solid Layer - Typically they are the size of the active composition, but can be any size.
- Can be transformed, masked, and have effects applied
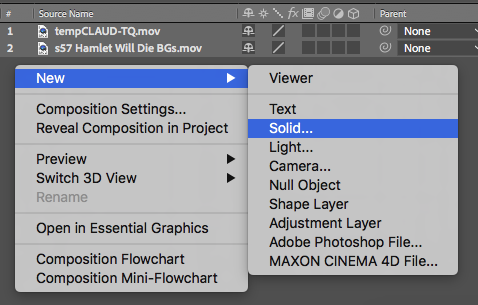
- Create a new Solid via the menu item Layer > New > Solid… or with a Right-click on some empty area in the timeline:
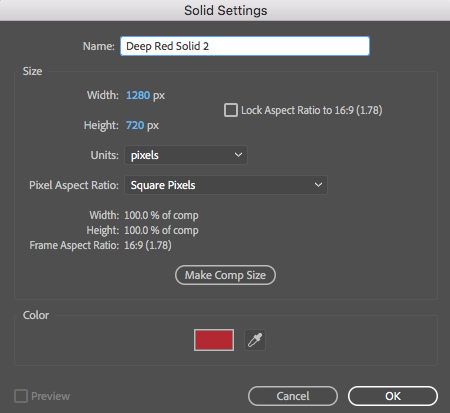
Creating a new Solid Layer This will open the Solid Settings window, where you can pick the color, a name, size, etc of the new Solid layer:
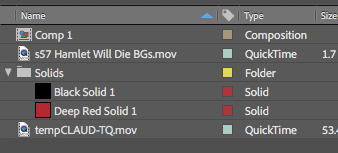
- After Effects will create a Solids folder in your Project Panel where it will store any Solid Layers you create. This is to allow for sharing similar solids between multiple comps in your project:
The Solids folder in the Project Panel will be auto-created by AE Here’s a Solid Layer that has been transformed, masked, and some Effects applied:
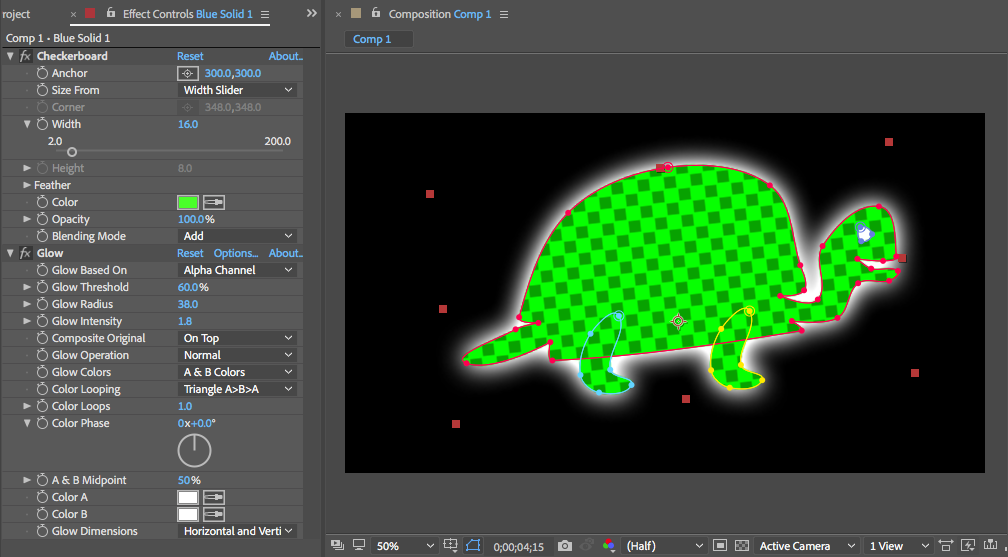
A turtle made from a green solid, some masks, and some effects
- Used for creating simple solid-color layers which might be used as-is, or as a base for further work:
- Adjustment Layers
- Used to apply effects to multiple layers at once. Affects all layers lower down in the layer order.
- You can create an Adjustment Layer via the menu item Layer > New > Adjustment Layer or with a Right-click on some empty area in the timeline:
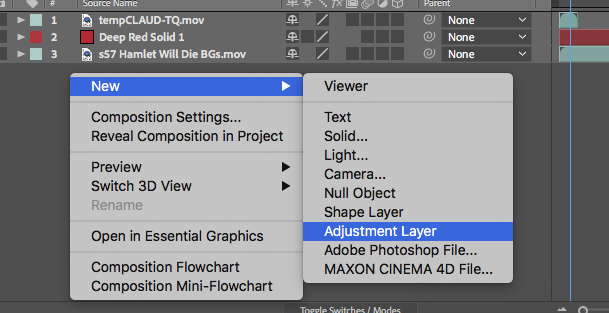
Creating a new Adjustment Layer with right-click in the timeline Then, move the new Adjustment Layer up or down to the appropriate spot in the layer order, and add one or more effects:
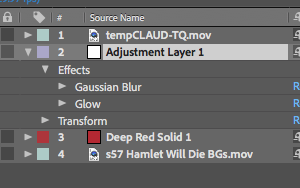
An Adjustment Layer that will affect layers 3 and 4 (but not layer 1) - By default, Adjustment Layers will be the full size of the active composition, but can be changed to be any size, can be transformed, animated, and can also be masked:
An adjustment layer with a mask - Reducing the Opacity of an Adjustment Layer is sometimes useful for reducing the strength of any effects on the Adjustment Layer. (This often helps with color correction effects, but not so much with blur or distortion effects.) As a side note, each individual effect has its own Effect Opacity.
- Semi-Useless Trivia: Adjustment Layers are actually special versions of Solids that have the “Adjustment Layer” switch turned on:
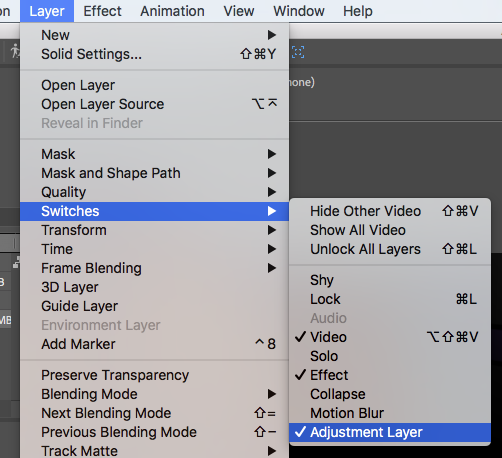
Adjustment Layers are actually Solids with a special switch enabled This means you can also manipulate an Adjustment Layer’s size, aspect ratio, etc by opening its Solid Settings. It also means that Adjustment Layers will show up in the Solids folder in the Project Panel.
- Parenting Layers
- Sometimes you want one or more layers to be attached to a “master” layer:
A parent layer with three child layers - Parenting attaches one or more child layers to a parent layer. Imagine an invisible rod connecting the parent to the children. Whatever transformation you do to the parent (scaling, position, rotation, but not opacity) the children also do:
- Parenting can be achieved with the Parent dropdown selector or with the Parent Pickwhip
 . Each layer has these two controls under the Parent column:

In each layer’s Parent Column you can access the parent pickwhip and the dropdown selector In the screen grab above, Layer 1 is the parent of Layer 2, and Layer 1 has no parent.
- The Parent Pickwhip is a drag-and-drop style control for quickly selecting a layer as a parent.
- Parent layers can have more than one child, but not the other way around: i.e., all AE parents are single-parents.
- Child layers can be Parent layers to other layers, creating complex trees of parent-child relationships:

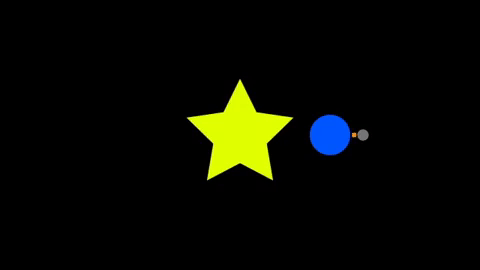
A dog layer “parented” to a boy layer “parented” to a mom layer Here’s an example of a simple solar system done with parenting:
A sun, earth, moon, and lunar orbiter Here’s what the layers look like in AE:
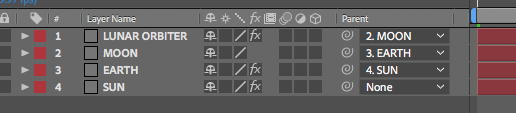
Solar system setup in AE
- Sometimes you want one or more layers to be attached to a “master” layer:

THE END!